
In this article, I show you how to rebuild a VS-Code extension using the SFTP extension as an example.
SFTP extension
Let's say you are using a nice extension, but you want to add some functionality or fix a bug.
SFTP extension syncs your local directory with a remote server directory, but it has an annoying bug - the Upload Changed FIles command does not work.
Workaround Upload Changed Files Bug
1. Clone or fork of an extension repo
Clone or fork this repo (this is a fork of the wandway repo (and this is a fork of the liximomo repo)): github.com: vscode-sftp.
Use any terminal (I used PowerShell or Git-Bash on Windows; and Konsole on MX Linux).
2. Install latest stable node
Skip this step if you have installed the last stable version of node.
Open the folder where you cloned the vscode-sftp extension and, on Windows (make sure you install the nvs - equivalent to nvm), run:
nvs
You should see a menu with node versions. Select the node version: 17.0.1 (if you do not see this node version, choose Download another version menu item and install it).
On Linux, you can work with any of a node version older than 10. Just use nvm.
3. Install extension dependencies
After installing the required node version, run the command:
npm i
This command should install all the extension dependencies.
If you are using npm and you get this error:
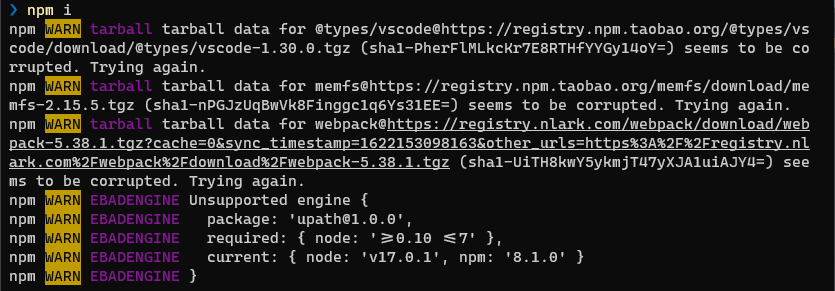
Try removing the yarn.lock file from the root folder and running npm i command again.
Everytime you rerun the npm i command, you must delete node_modules folder and package-lock.json file.
If you can't rebuild an extension on Windows, try doing the same on Linux (you can rebuild an extension on Linux and use it later on Windows). In my case, it was so. Until I installed the latest stable version of node using nvs on my Windows machine.
4. Fix SFTP extension bug
Let's make Upload changed files command visible.
Open VS-Code editor from terminal from extention root folder with command:
code .
Locate the package.lock file in the extension root folder, open it in VS Code editor and find these two lines:
...
        {
          "command": "sftp.upload.changedFiles",
          "when": "false"
        },
...
Replace the last line above with the last line below:
        {
          "command": "sftp.upload.changedFiles",
          "when": "sftp.enabled"
        },
5. Add SFTP extension functionality
Let's add keyboard shortcut to the Upload changed files command.
Add this highlighted block before the jsonValidation line (or wherever it is correct) in the package.lock file:
    },
    "keybindings": [
      {
        "command": "sftp.upload.changedFiles",
        "key": "ctrl+alt+u",
        "when": "sftp.enabled"
      }
    ],
    "jsonValidation": [
Save the package.lock file.
6. Avoiding compiler error
When compiling an extension, you may receive a Can't resolve 'minimal' error. To avoid this error, replace this line in the ./.vscode/tasks.json file:
23 "args": ["run", "dev", "--", "--display", "minimal"],
with:
23 "args": ["run", "dev"],
7. Launch the extension in dev mode
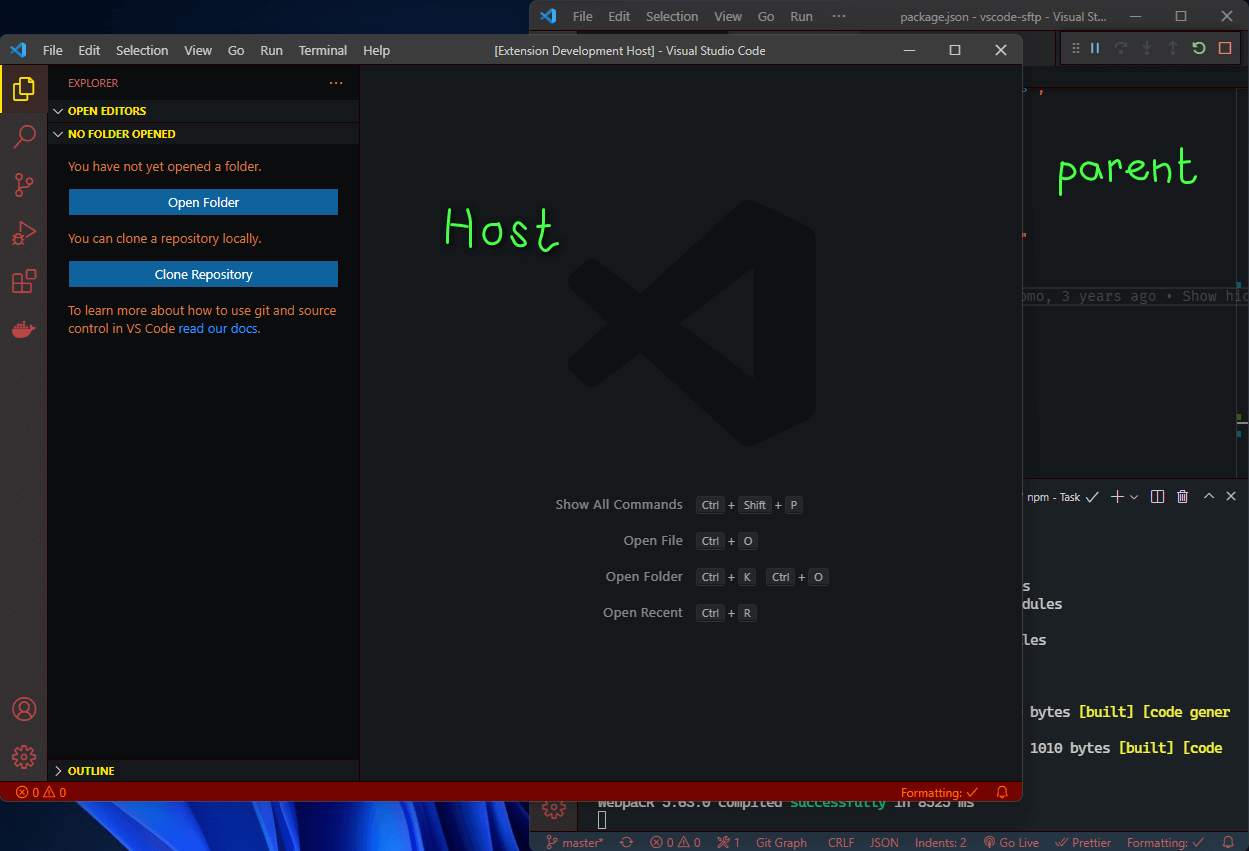
Press F5 in VS Code (let's call that VS-Code window - parent window). This will compile and run the extension in a new Extension Development Host window.
Make sure you uninstall the installed instance of the sftp extension, otherwise you will run two copies of this extension and cause a conflict.
Wait for сompilation to stop.
To verify that the compilation was successful, run the command Tasks: Show Running Tasks in the Command Palette (Ctrl+Shift+P) in the parent VS-Code window.
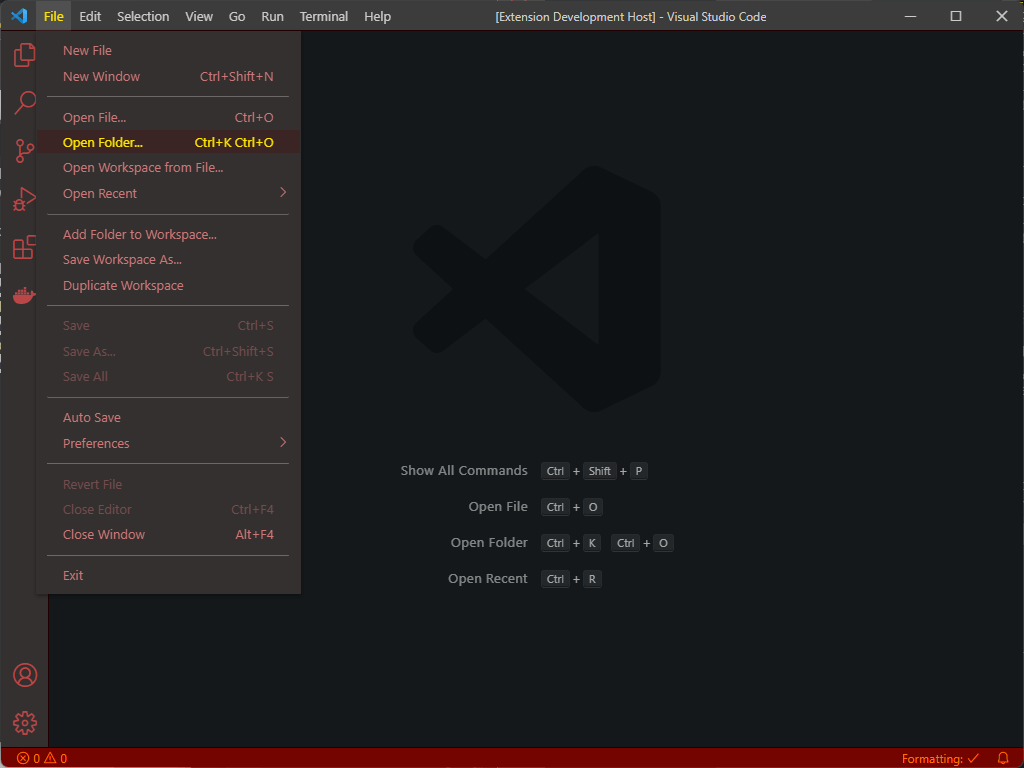
8. Open your project to test uploading
In the Extension Development Host window that opens, open the folder with your local project (via the File menu), which you want to connect to the remote server:
If you have opened this project folder in another VS-Code window, close it and try to open it again from the Extension Development Host window.
If you already have the sftp.json config file, you should see the sftp extension icon in the Activity bar:
![]()
And then you can skip the next two steps.
9. Create sftp config file
If you don't have an sftp.json config file, press F1 or Ctrl+Shift+P to open Command Palette and enter the command:
SFTP: Config
If you see this command listed, run it.
After running the SFTP: Config command, a new sftp.json config file will be created and you should see its initial content:
{
  "name": "My Server",
  "host": "localhost",
  "protocol": "sftp",
  "port": 22,
  "username": "username",
  "remotePath": "/",
  "uploadOnSave": true
}
At the same time, you should see the sftp extension icon in the Activity bar:
![]()
10. Setup your sftp connection
Populate the sftp.json using your host credentials as so:
{
  "name": "does-not-matter", // any name
  "host": "my-host.com", // the name of your remote host
  "protocol": "sftp",
  "port": 22,
  "username": "my-username", // login
  "remotePath": "/home/my-username/", // root your remote host
  "uploadOnSave": false
}
You can optionally use ssh-agent and the keys pair (two files) generated with ssh-keygen to connect to remote host. Read about using ssh-agent with ssh.
11. Test Upload Changed Files command
Make sure you are in the Extension Development Host window.
Change some file and save it.
Press F1 or Ctrl+Shift+P to open Command Palette and type:
SFTP: Upload Changed Files
You should see this command in the list of SFTP commands:

Try using the Upload Changed Files command with the Ctrl+Alt+U keyboard shortcut.
To see the result of your action, open sftp output window by pressing sftp button:
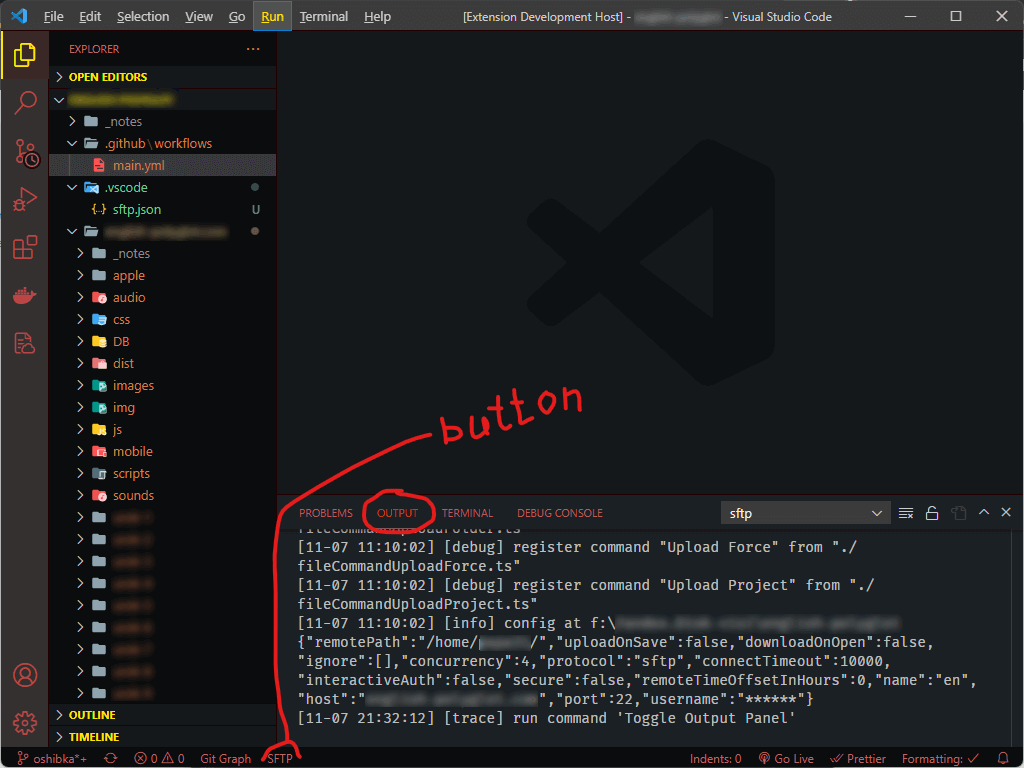
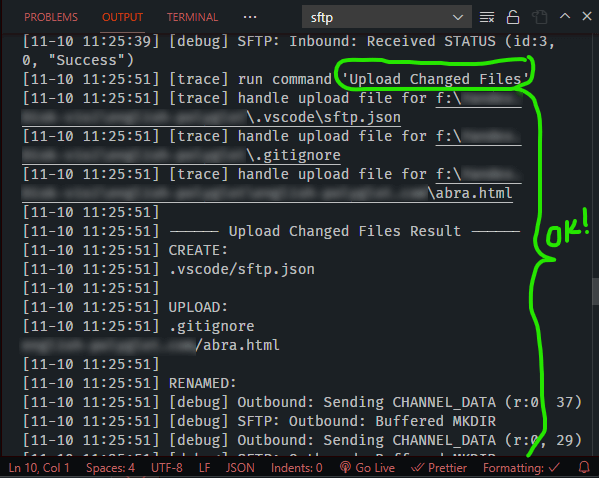
After running the Upload Changed Files command, you should see many, many lines after the run command 'Upload Changed Files' line in the log output:
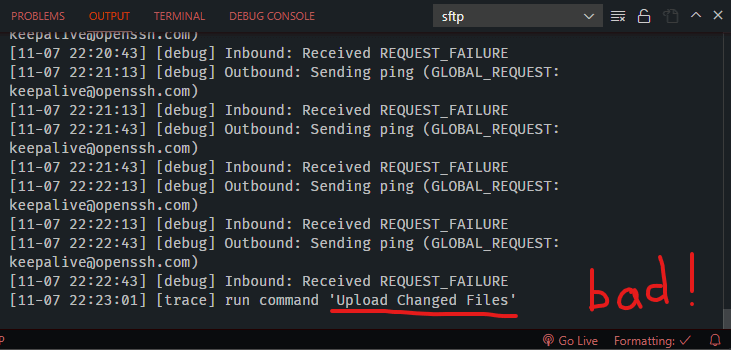
If you see only one line, then the command is not working:
If the Upload Changed File command does not work, remove the dist folder from the extension root and run compilation again. If that doesn't help, make sure you are using the last stable version of node. And maybe start from the beggining. If nothing helps, download my finished build file: github.com: sftp-workaround-upload-bug.vsix and skip to step 14.
12. Prepare build script
If the Upload Changed File command works, you can start rebuilding the sftp extension.
Let's simplify the build script first. Close Extension Development Host window, open package.lock file again and locate the scripts block. Find the pub:debug script:
...
  "scripts": {
    "vscode:prepublish": "npm run compile",
    "compile": "webpack --mode production",
    "dev": "webpack --mode development --watch",
    "test": "jest",
    "package": "vsce package",
    "pub:debug": "rm -rf _debug && mkdir _debug && vsce package --out _debug/sftp-debug.vsix && cd _debug && git init && git commit --allow-empty -m 'update debug package' && git checkout -b debug-pacakge && cp ../INSTALL_DEBUG.md README.md  && git add . && git commit -am 'update debug package' && git push git@github.com:liximomo/vscode-sftp.git debug-pacakge --force"
  },
...
Replace the last pub:debug script with build one (see below):
  "scripts": {
    "vscode:prepublish": "npm run compile",
    "compile": "webpack --mode production",
    "dev": "webpack --mode development --watch",
    "test": "jest",
    "package": "vsce package",
    "build": "vsce package --no-yarn --out sftp-workaround-upload-bug.vsix"
If you are using yarn instead of npm, remove --no-yarn option from the build script above.
13. Build .vsix extension
Make sure you already install the Visual Studio Code Extension(vsce) manager:
npm i -g vsce
Make a new build of the sftp extension using the build script:
npm run build
If everything is ok, you'll see the green DONE label in your terminal:
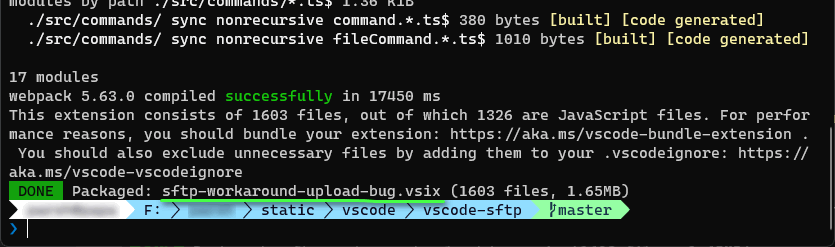
You have just created the sftp-workaround-upload-bug.vsix file in the root folder of the sftp extension.
14. Install .vsix extension
Open VS-Code, press F1 and enter the command in Command Palette:
Extension: Install from VSIX...
Press Enter.
Locate the .vsix file in the dialog box and press Install button.
Enjoy!